First
I bought an ATU-100 antenna tuner parts kit and assembled it.
The surface-mount components were pre-soldered to the printed circuit board, so assembly required winding the toroidal core and soldering the DIP components.
The coil winding involves winding a specified wire around a specified core for a set number of turns. I was concerned about whether the coil was properly assembled, so I measured it with an LC meter.
The LC meter I used this time was also assembled from the circuit board and features an OLED display based on the Franklin oscillator circuit method.
Now, let's move on to explaining how to design and assemble the OLED LC meter.
*Photo3 OLED LC 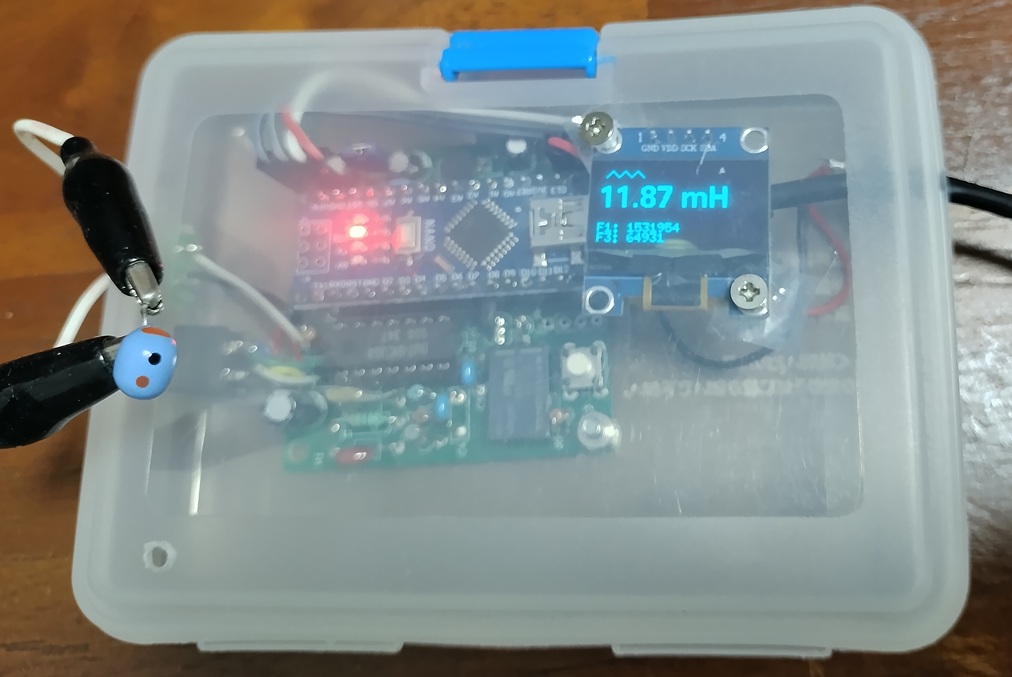 >
>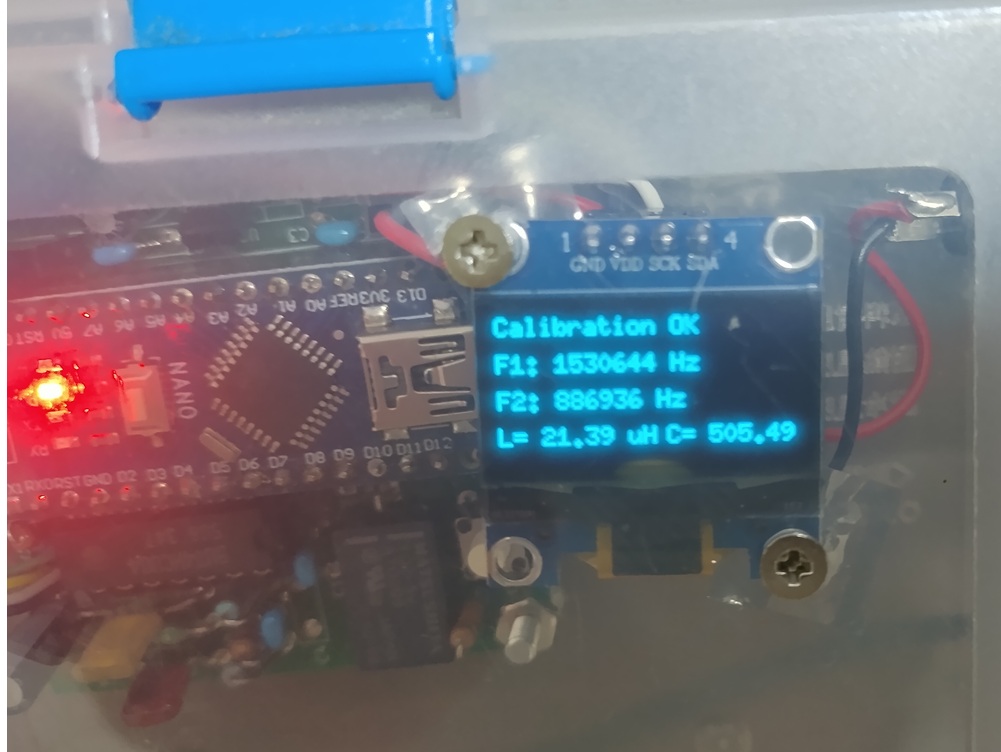
OLED LC Meter
The principle of an LC meter using a Franklin oscillator is to calibrate the L and C values using a standard C and then calculate the value of the added L or C to be measured. A relay is used to switch the standard C on and off in calibration mode. A two-pole, two-circuit switch is also used to switch between L and C measurements. The Arduino microcontroller controls the above and also measures and calculates frequency. The circuit diagram is as follows.
*Photo4 OLED LC meter schematic
Creating the PCB @PCBWAY
I used KiCAD to design the printed circuit board using the circuit above. KiCAD included the Arduino Nano pattern. There was no relay pattern, but since it uses the same 8P DIP package, I used that instead. The size follows a previous rule from discount PCB manufacturers that stated that anything under 50mm x 50mm was cheap. I ordered this for PCBWAY.
*Photo5 KiCAD circuit and pattern >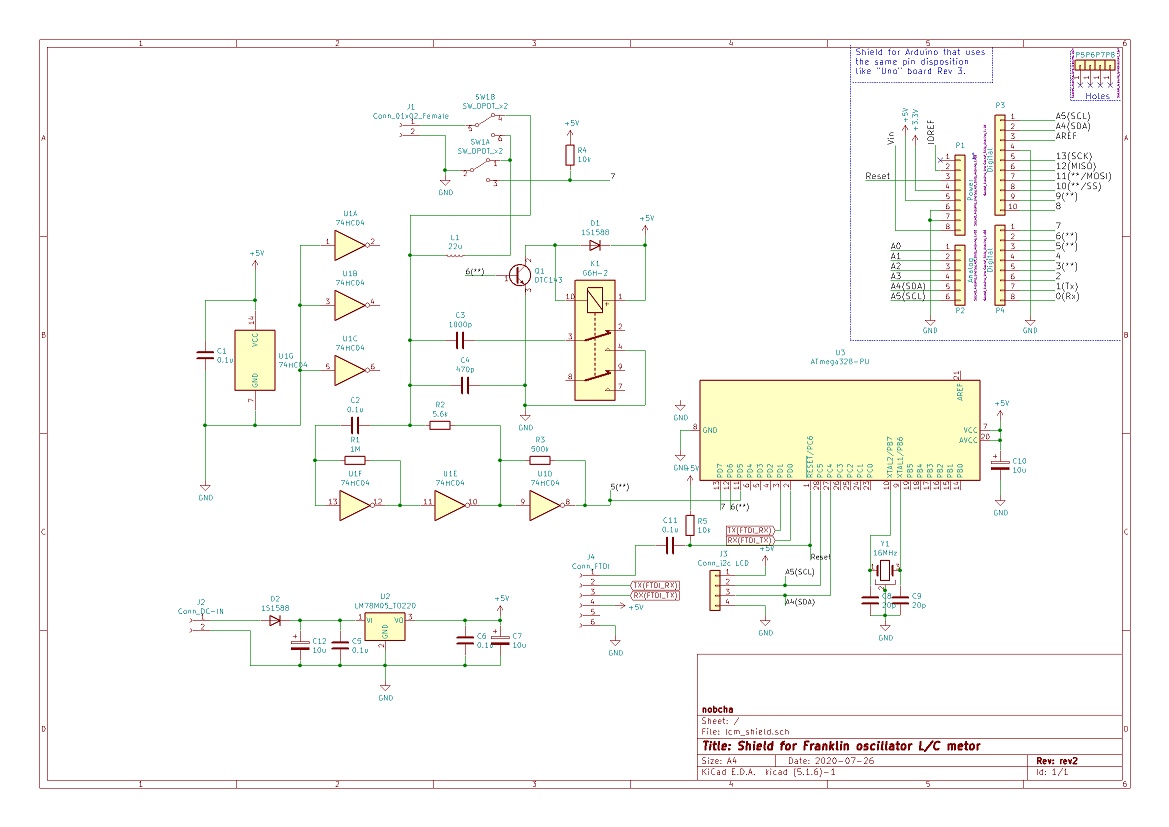
The completed Gerber file for procuring the PCB is below. GITHUB
Component Installation
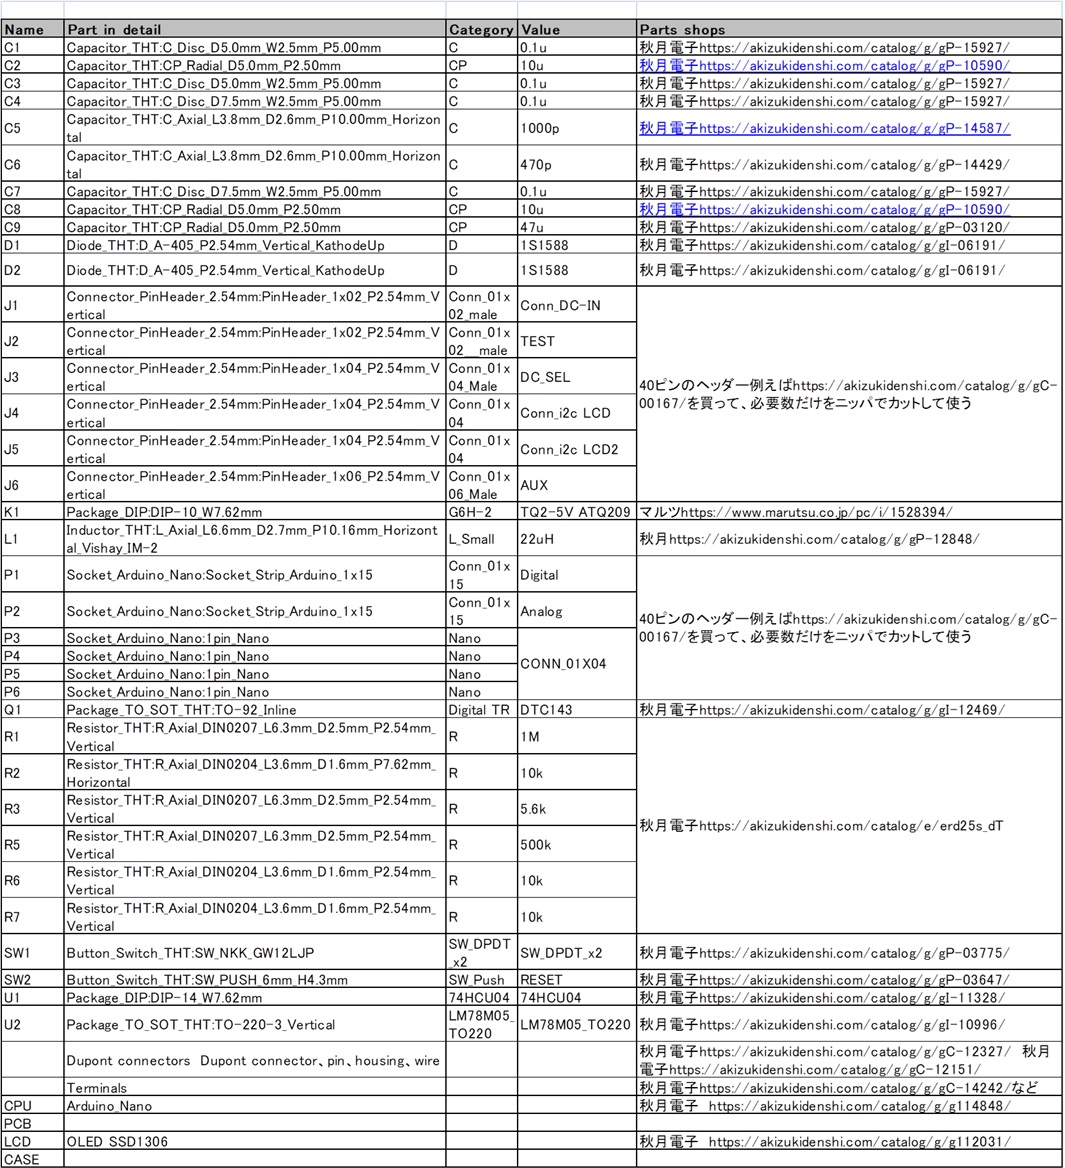
The bill of materials is as follows. The Arduino Nano is mounted using pin headers. The OLED module is connected via cable. The switch is extended with a wire to accommodate case installation. The measurement terminals are DIN mounting terminals. The power supply is connected via a φ2.1 DC-IN terminal via a wire. These details depend on the case installation plan, so please consider them according to your individual circumstances.
*Photo6 BOM
sketch
Arduino Sketch
The required libraries are listed in the comments within the code.

